
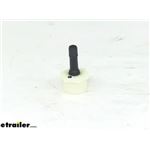
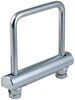
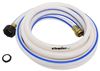
Use this plastic blow-out plug to clear any excess water from your RV's water lines before storing your RV for the winter. Screw plug into your city water inlet and inject air through the threaded valve to blow out any water.
Features:
Specs:
Videos are provided as a guide only. Refer to manufacturer installation instructions and specs for complete information.
AJ: What's up everybody, it's AJ with etrailer.com. Today we're going to be checking out his blow out plug from JR Products. What it's going to do is it's going to screw in here to your city water connection. And with the cap removed, I can put an air hose up to this and it's going to pump air through your lines and put out any of that extra water, it's going to push it out that way it's not there. It's a common thing for winterization of your rig. You're going to blow out all the water out of the lines, put some antifreeze in there that way none of the pipes freeze over the winter or burst.I would suggest to get in the habit of doing it after every long trip.
Just get that extra water out because the longer the water sits there, you've got pipes that go like this, the water likes to rest down here in the loop and you don't get that out of there by just draining the freshwater tank. It'll sit in there and get stagnant after a couple of days and if it takes any longer you can get some algae in there and just ruin the pipes and that's the water you're drinking and showering in and I don't want it to be there. So it's just good practice to go ahead and blow your lines out.Before you start running air through your lines, there's a couple of steps you have to go through to make sure your rig is ready to do that. We're going to walk through that together and go step by step on what you need to do. First step is you want to go ahead and fund your freshwater tank lever here.
Ours is located down there. I'm going to pull this handle and let as much water out as we can, that way there's less in the lines. Just going to pull this and just watch it drain. That's letting most of the water out, that way when we hook up the compressor, we'll just blow out a little bit of the extra water and we'll be good.Our next step is we're going to go ahead and throw the switch for the bypass of the water heater. Now why we're doing that is we don't want to pump a bunch of water into the water heater, or if you're getting ready to winterize it, you don't want to pump a bunch of antifreeze into your water heater, so flipping that switch bypasses it and we're good to go.
Now, ours is down here. Here you can see, I flipped that switch up now and so we're good to move on to the next step.Now we're going to open our valves because if we're going to pump a bunch of air in through the lines, we don't want to blow out the lines if there's nowhere for the air to go. So we're going to start with the sink. You're probably going to get some water coming out. We'll let that drain.
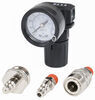
You can see it's already slowing down. And we're going to go through one by one and go through all the valves. So we're going to just sink in here, sink in the bathroom, we're going to turn on the shower and even flush the toilet. And with the hot and cold, you go ahead and throw the other one too, just let all the water out of both lines. Another thing to do just to be safe before we put air through the lines is go ahead and step down on the pedal of our toilet here, that way it would release anything else in there before we add air.Now there's two different approaches for this. You can open up all of the valves at once and blow out the lines. We're going to do them one by one. So remember the sink is open, now we're going to attach our compressor, which I went ahead and lowered the PSIs to 30, that way, there's not too much air going in there, we're not going to blow up any lines or anything like that. We want to be safe and careful for that too. I'm actually surprised about how much water is still coming out and that we're leftover in the lines. We already pulled the tank, drained it all the way down. This just shows you, you don't want this water just sitting there in your lines.We already went back and closed the valves in our kitchen sink, now we're going to come here to the bathroom sink and open these up. Looks like not a lot is coming out this time. We got most of it in the kitchen. Next up is the shower. Same as before, just open up both of these valves all the way and let's see what happens. With the lines all blown out, I'm just going to come back to our fresh water tank and close the valve.So it's that easy to clear out your lines. I'd suggest just making a habit to do it every time you come back from one of your adventures. You bought the fitting anyway, you might as well use it.I noticed when I was using this, I didn't hear any noises, that I didn't feel any air coming out. It was nice and airtight. And I think it's going to hold up over time pretty well. This is a pretty durable plastic. Even if I drop this, I don't think I'd worry about it breaking or cracking anywhere and I liked the fact that it has this brass end here with a screw-on cap, much like your car tire or a bike tire. Now I will say I prefer the one from Valterra that's made out of brass and I'll show you that one side-by-side here. I just, the brass fitting, this lets me know that this is going to hold up no matter what I put it through it, you might not be as clumsy as me, but I'll probably drop it and I just don't want to chip or anything like that. So I would recommend this one, if you want to go with brass fittings, if that's what you've done with your rig this far, but this one's going to hold up just fine I think too.That does it for our look at this blow out plug from JR Products. I hope that helped..
Average Customer Rating: 5.0 out of 5 stars (4 Customer Reviews)
Use this plastic blow-out plug to clear any excess water from your RV's water lines before storing your RV for the winter. Screw plug into your city water inlet and inject air through the threaded valve to blow out any water.Looks like this part should work as int ended.

This makes winterization a breeze. I can blow out the water from my system in 15 minutes. I save over $[XX] every year blowing my waterlines and adding antifreeze myself.
Worked well. Simple
Info for this part was:
At etrailer.com we provide the best information available about the products we sell. We take the quality of our information seriously so that you can get the right part the first time. Let us know if anything is missing or if you have any questions.


Thank you! Your comment has been submitted successfully. You should be able to view your question/comment here within a few days.
Error submitting comment. Please try again momentarily.